前排提示:
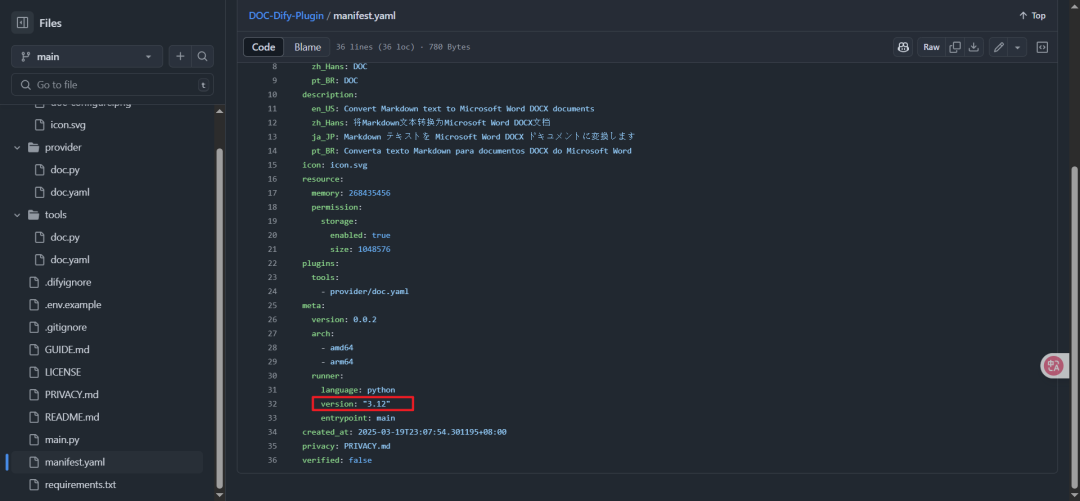
如果使用虚拟机刷机的,需要在设置虚拟机的地方把网络设置成桥接模式, 也就是书需要在要刷机的小米路由器的网段下
说人话就是小米ip是192.168.31.1
你的机器ip需要是192.168.31.x
否则无法开启telnet
[scode type="yellow"]注意:必须使用路由模式,中继模式是打不开telnet的[/scode]
该方法目前实测适用于3c 3G 3a 4a百兆版 4a千兆版
理论适用小米4代及以前的所有产品
视频教程
<iframe class="iframe_video" src="//player.bilibili.com/player.html?aid=719229886&bvid=BV1sQ4y1U7tL&cid=443586409&page=3" scrolling="no" border="0" frameborder="no" framespacing="0" allowfullscreen="true"> </iframe>
引用
刷机参考此文
原生固件来源
水友反馈
[scode type="blue"]A:建议linux下使用这个python包,windows和mac下一大堆问题,我原来3.8安装依赖包时失败了 又改了教程里要求的3.6 <p style="color:blue">-------- 来自水友 (36)</p>[/scode]
[scode type="blue"]B:小米3C要用0.0.2版本,只有0.0.2版本可以用,秒进。我刷这个用的win10直接运行python <p style="color:blue"> ---- 来自水友 小麻瓜。</p>[/scode]
[scode type="blue"]C:這邊想要指正一點關於 xhell中逐条执行以下命令,备份至tmp目录 這一節。這邊如果備份後沒有及時清除空間,會造成/tmp目錄空間佔用過多造成路由器卡死。在我的小米4C上實測是這樣的,希望可以加個tips說明一下。<p style="color:blue">---- 来自水友 nickname。[/scode]
A.工具准备:
1.准备电脑一台
win10+ubuntu
子系统(以下统称linux)或者linux系统
或者win7等+虚拟机
(以下统称linux)
2.准备小米路由器若干
B.教程开始:
[scode type="yellow"]小米路由器先升级成我提供的固件
[/scode]
[button color="info" icon="glyphicon glyphicon-cloud" url="https:\/\/pan.yuos.top\/s\/AquY?path=%2F%E5%A4%87%E4%BB%BD%2F%E5%BC%80%E5%8F%91%E7%89%88%E5%9B%BA%E4%BB%B6" type=""]小渔网盘[/button]
1.使用root
登陆进入linux系统
2.换成国内源
这里我使用的是ubuntu16.04
,18系统的请自行百度,或者换16
首先备份源
为了照顾小白,还是说一下吧,sudo是使用root权限执行命令,所以输入这个命令后会让你输入密码。
此时输入的密码你是看不见的,实际上是输入进去了,不必担心。
对了,补充一句,密码是你当前用户的密码。
如果你当前用户是root用户,那么默认是不会让你输入密码的。
sudo cp /etc/apt/sources.list /etc/apt/sources.list.bak
#备份原有源
编辑
cd /etc/apt/
sudo vim ./sources.list
#编辑原有源
复制代码,然后把你的输入法调成英文,然后按两下d键,会删除一行,就这样,把所有内容都删了
然后按 i
进入编辑模式
1.更换阿里源
#更换阿里源
deb http://mirrors.aliyun.com/ubuntu/ bionic main restricted universe multiverse
deb-src http://mirrors.aliyun.com/ubuntu/ bionic main restricted universe multiverse
deb http://mirrors.aliyun.com/ubuntu/ bionic-security main restricted universe multiverse
deb-src http://mirrors.aliyun.com/ubuntu/ bionic-security main restricted universe multiverse
deb http://mirrors.aliyun.com/ubuntu/ bionic-updates main restricted universe multiverse
deb-src http://mirrors.aliyun.com/ubuntu/ bionic-updates main restricted universe multiverse
deb http://mirrors.aliyun.com/ubuntu/ bionic-proposed main restricted universe multiverse
deb-src http://mirrors.aliyun.com/ubuntu/ bionic-proposed main restricted universe multiverse
deb http://mirrors.aliyun.com/ubuntu/ bionic-backports main restricted universe multiverse
deb-src http://mirrors.aliyun.com/ubuntu/ bionic-backports main restricted universe multiverse
2.更换清华源
#更换清华源
deb https://mirrors.tuna.tsinghua.edu.cn/ubuntu/ bionic main restricted universe multiverse
deb-src https://mirrors.tuna.tsinghua.edu.cn/ubuntu/ bionic main restricted universe multiverse
deb https://mirrors.tuna.tsinghua.edu.cn/ubuntu/ bionic-updates main restricted universe multiverse
deb-src https://mirrors.tuna.tsinghua.edu.cn/ubuntu/ bionic-updates main restricted universe multiverse
deb https://mirrors.tuna.tsinghua.edu.cn/ubuntu/ bionic-backports main restricted universe multiverse
deb-src https://mirrors.tuna.tsinghua.edu.cn/ubuntu/ bionic-backports main restricted universe multiverse
deb https://mirrors.tuna.tsinghua.edu.cn/ubuntu/ bionic-security main restricted universe multiverse
deb-src https://mirrors.tuna.tsinghua.edu.cn/ubuntu/ bionic-security main restricted universe multiverse
deb https://mirrors.tuna.tsinghua.edu.cn/ubuntu/ bionic-proposed main restricted universe multiverse
deb-src https://mirrors.tuna.tsinghua.edu.cn/ubuntu/ bionic-proposed main restricted universe multiverse
粘贴进去之后,点ESC,然后输入 :wq
然后点回车,就保存好了
接下来更新源
apt-get update
apt-get upgrade
耐心等待更新完成(如果准备我上面说的第二个工具,此时你几乎不用等待)
3.安装python3
下面的命令一条一条的复制粘贴回车。
sudo apt-get install python3.6
sudo apt-get install python3-pip
4.电脑连接小米路由器(wifi,网线都行)
电脑浏览器打开小米路由器的管理页面
不要关闭
5.回到linux把代码拉到本地
把 https://github.com/acecilia/OpenWRTInvasion 的代码利用下面的命令下载下来
wget https://github.com/yuos-bit/OpenWRTInvasion/archive/refs/tags/0.0.2.zip && unzip 0.0.2.zip
# github源
wget https://gitee.com/yuos-bit/other/attach_files/893486/download/OpenWRTInvasion-0.0.2.zip && unzip OpenWRTInvasion-0.0.2.zip
# gitee源
6.下面利用漏洞开启telnet
cd OpenWRTInvasion-0.0.2
/*如果使用OpenWRTInvasion-0.0.3请使用命令 cd OpenWRTInvasion-0.0.3/ */
pip3 install -r requirements.txt
python3 remote_command_execution_vulnerability.py
输入完之后系统会提示你输入路由器的ip
默认是192.168.31.1
回车之后会让你输入stok
。这个stok
就在上面我说的不让你关闭的小米路由器的管理页面。
你地址栏显示的应该是
http://192.168.31.1/cgi-bin/luci/;stok=xxxxxxxxxx/web/home#router
这里面的xxxxxx就是你的stok
在地址栏复制stok,粘贴在linux里面 然后回车。
自动利用漏洞开启telnet
当显示telnet 192.168.31.1的时候一般来说就是成功了
7.telnet连接路由器,先备份原有固件
以及eeprom
(非常重要)
1.备份编程器固件 ::aru:cheer::
[post cid="382" /]
xhell登录路由器
shell工具下载
xhell中逐条执行以下命令,备份至tmp目录,使用win10自带的资源管理器访问 ftp://192.168.31.1
即可
查看分区如下,命令:
cat /proc/mtd
<p style="color:red">root@XiaoQiang:~# cat /proc/mtd</p>
dd if=/dev/mtd0 of=/tmp/mtd0.bin
dd if=/dev/mtd1 of=/tmp/mtd1.bin
dd if=/dev/mtd2 of=/tmp/mtd2.bin
dd if=/dev/mtd3 of=/tmp/mtd3.bin
dd if=/dev/mtd4 of=/tmp/mtd4.bin
dd if=/dev/mtd5 of=/tmp/mtd5.bin
dd if=/dev/mtd6 of=/tmp/mtd6.bin
dd if=/dev/mtd7 of=/tmp/mtd7.bin
dd if=/dev/mtd8 of=/tmp/mtd8.bin
dd if=/dev/mtd9 of=/tmp/mtd9.bin
dd if=/dev/mtd10 of=/tmp/mtd10.bin
dd if=/dev/mtd11 of=/tmp/mtd11.bin
dd if=/dev/mtd12 of=/tmp/mtd12.bin
2.备份eeprom
dd if=/dev/mtd3 of=/tmp/eeprom.bin
# 需要备份的eeprom 请根据实际更改命令备份 Factory(mtd*)分区,大小一般为64kb
xhell中逐条执行以下命令,备份至tmp目录,使用winscp下载备份,协议选scp
也可以使用 FinalShell
下载
FinalShell
8.获取breed
小米4A千兆版 :
cd /tmp && wget https://gitee.com/yuos-bit/other/attach_files/893476/download/breed-mt7621-pbr-m1.bin
小米3G 和 小米4:
cd /tmp && wget https://gitee.com/yuos-bit/other/attach_files/893478/download/breed-mt7621-xiaomi-r3g.bin
小米3A,3C,4A百兆版,4C:
cd /tmp && wget https://gitee.com/yuos-bit/other/attach_files/914229/download/breed-mt7688-reset38.bin
网盘地址:
小渔网盘
9.将备份的eeprom保存到本地
[scode type="yellow"]两者任选其一[/scode]
下载好之后,参照下图连接路由器
登陆后,右边找到tmp文件夹,点进去下载eeprom.bin到本地。(非常重要)
10.刷breed
mtd write breed-mt7688-reset38.bin Bootloader
# 小米3A,3C,4A百兆版,4C
mtd write breed-mt7621-xiaomi-r3g.bin Bootloader
# 小米3G 和 小米4
mtd write breed-mt7621-pbr-m1.bin Bootloader
# 小米4A千兆版
第一次进breed刷固件的时候,需要先按照第二张图固件更新
上传固件的同时把eeprom
然后把备份的eeprom(信号文件)
给刷了。
怎么刷eeprom?
你要是还不会,那么抱歉。。。我帮不了你
刷完后自动重启
[scode type="blue"]拒绝龟速百度,从点滴做起![/scode]
11.固件下载链接:
蓝奏网盘
小渔网盘
12.padavan下载链接:
蓝奏网盘
小渔网盘
Github下载
13.固件Web管理:
[scode type="yellow"]
openwrt默认网关地址:10.32.0.1
Openwrt web:root
password:password
padavan默认网关地址:10.32.0.1
Padavan Web: admin
password:admin
如果是从光猫DHCP下来的请修改默认网关地址,否则网关冲突没网!
[/scode]
14.补充
[button color="info" icon="glyphicon glyphicon-cloud" url="https:\/\/pan.yuos.top\/s\/AquY?path=%2Funlock-Telnet" type=""]开发工具[/button]
[scode type="blue"]经过本人实际测试,建议使用miwifi_r4cm_firmware_c6fa8_3.0.23_INT
版本进行破解,其他版本亲测不太好破解Telnet[/scode]
[button color="info" icon="glyphicon glyphicon-cloud" url="https:\/\/pan.yuos.top\/s\/AquY?path=%2F%E5%A4%87%E4%BB%BD%2F%E5%B0%8F%E7%B1%B3%E8%B7%AF%E7%94%B14C%E5%AE%8C%E6%95%B4%E5%A4%87%E4%BB%BD" type=""]小渔网盘[/button]
15.关于4C刷Openwrt说明
在这里计算下16进制的值:https://tool.oschina.net/hexconvert/
搭建本地Web服务器
此处借用breed
内置的wget命令将本地的文件上传到路由器内存中。先在存放python3.7
的目录下运行python.exe -m http.server
开启一个本地ftp服务器,一般默认端口为8000
,然后通过浏览器打开breed同网段下的该ftp服务器,如http://192.168.1.2:8000
;然后右键获取openwrt.bin
的文件链接,wget [link]
通过局域网下载本地文件。下载完成后注意看breed的提示,因为此时下载文件是存放在内存中的,需要记下存放的内存地址。
[button color="info" icon="glyphicon glyphicon-cloud" url="https:\/\/pan.yuos.top\/s\/vXHQ?path=%2Fwindows%2F%E8%BD%AF%E4%BB%B6%E5%A4%A7%E5%85%A8%2FPython3.7" type=""]Python3.7免安装包[/button]
# 下面的是我的示例
cd D:\python-3.7.0-embed-amd64
# 进入存放目录
python.exe -m http.server
# 搭建一个临时的http服务器
wget http://172.168.0.149:8000/openwrt/openwrt-ramips-mt76x8-xiaomi_mi-router-4c-squashfs-sysupgrade.bin
在python3.7目录下新建一个openwrt目录用于存放资源
再到web端查看下载链接
拉取固件包
telnet 192.168.1.1
wget http://192.168.1.2:8000/openwrt/openwrt-ramips-mt76x8-xiaomi_mi-router-4c-squashfs-sysupgrade.bin to 192.168.1.1
connected.HTTP request sent, awaiting
response... 200 OK
Length: 1922059/0xb80326 (11.5MB) []
Saving to address 0x80000000
以上x.x.x.x为ip地址,可以看到下载成功后,breed将该文件保存到了地址为0x80000000的位置,注意这里没有文件名,下载保存下来的是存放地址
在命令行下执行
flash erase 0x160000 0xea0000
#这个命令是擦除flash中原有的数据
为我们要写入的文件腾点地方(按道理直接覆盖应该可以,但是我没试成功,还是先擦除,再写入才能成功, 0x160000为要写入firmware的目的地址
在命令行下执行
flash write 0x160000 0x80000000 0xb80326
# 0x160000为要写入firmware的目的地址, 0x80000000是下载的固件的保存地址, 0xb80326 是固件地址
这个时候,我们下载的固件实际上已经写入到flash了,可以启动了,在breed
界面执行 boot flash 0x160000
(注意这个是启动地址),回车,输出如下:
Trying to boot firmware from 0x00160000 in flash bank 0 ...
Reading data into memory ...
U-Boot firmware image header detected.
Image Name: MIPS OpenWrt Linux-5.10.72
...
更改Breed启动环境
如果成功,路由器就会自动重启,并进入我们刷的新系统中了,看到了openwrt
的界面。
虽然上一步已经成功了,但是很遗憾,断电重启路由器,进入breed
自动启动,breed
还是会从0x50000
处启动系统,那当然启动不成功了,和以前以前,会陷入自动循环重启中。怎么办?breed强大的环境变量功能来了,这些问题都是小case!首先进入breed的web界面,启用环境变量功能!这一步启动环境变量功能界面中,位置选择breed内部
其值默认即可,设置启用后,需要重启路由器,重启后再次进到breed
的web
界面中,上一个步骤已经设置启用了环境变量了,这一步我们就加上关键的环境变量,在环境变量界面,增加 autoboot.command
字段,值设为 boot flash 0x160000
,即可,这就是告诉breed
启动系统时,使用我们第5步中使用的那个命令boot flash 0x160000
,从0x160000
处启动,保存。
测试成果
重启,系统已经成功运行!
16.关于4A千兆版的刷Openwrt说明
对比4C和4A千兆版的代码得知上述命令不通用的原因是因为分区不同
4C的dts
partition@160000 {
label = "firmware";
reg = <0x160000 0xea0000>;
compatible = "denx,uimage";
};
4A千兆版的dtsi
firmware: partition@180000 {
compatible = "denx,uimage";
label = "firmware";
reg = <0x180000 0xe80000>;
4C的固件起始地址和终止地址是reg = <0x160000 0xea0000>
4A千兆版的是reg = <0x180000 0xe80000>
接下来就改些对应的地址就行了,其他命令基本一致
命令大全
考虑小白太多,算了,还是写一下吧
telnet 192.168.1.1
# 连接路由器
python.exe -m http.server
# 搭建一个临时的http服务器
wget http://192.168.1.2:8000/openwrt-ramips-mt7621-xiaomi_mi-router-4a-gigabit-squashfs-sysupgrade.bin
# 拉取源码
得到信息如下:
Connecting to 192.168.1.2:8000... connected.
HTTP request sent, awaiting response... 200 OK
Length: 12584029/0xc0045d (12MB) []
Saving to address 0x80001000
[========================================================================] 100%
Transmission completed in 4.9s.
注意,这里存放的地址是0x80001000
,内存地址是0xc0045d
flash erase 0x180000 0xe80000
# 清空数据
flash write 0x180000 0x80001000 0xc0045d
# 写入数据
boot flash 0x180000
# 启动
Trying to boot firmware from 0x00180000 in flash bank 0 ...
Reading data into memory ...
U-Boot firmware image header detected.
Image Name: MIPS OpenWrt Linux-5.4.162
Data Size: 2533596 Bytes
Load Address: 80001000
Entry Point: 80001000
Socket error Event: 32 Error: 10053.
Connection closing...Socket close.
Connection closed by foreign host.
Disconnected from remote host(192.168.1.1:23) at 09:58:11.
# 这里就会重启了
如果成功,路由器就会自动重启,并进入我们刷的新系统中了,看到了openwrt
的界面。
虽然上一步已经成功了,但是很遗憾,断电重启路由器,进入breed
自动启动,breed
还是会从0x50000
处启动系统,那当然启动不成功了,和以前以前,会陷入自动循环重启中。怎么办?breed强大的环境变量功能来了,这些问题都是小case!首先进入breed的web界面,启用环境变量功能!这一步启动环境变量功能界面中,位置选择breed内部
其值默认即可,设置启用后,需要重启路由器,重启后再次进到breed
的web
界面中,上一个步骤已经设置启用了环境变量了,这一步我们就加上关键的环境变量,在环境变量界面,增加 autoboot.command
字段,值设为 boot flash 0x180000
,即可,这就是告诉breed
启动系统时,使用我们第5步中使用的那个命令boot flash 0x180000
,从0x180000
处启动,保存。
测试成果
重启,系统已经成功运行!
16.关于小米路由器3A的刷Openwrt说明
<iframe class="iframe_video" src="//player.bilibili.com/player.html?aid=808230076&bvid=BV1x34y1i7Nf&cid=484919396&page=1" scrolling="no" border="0" frameborder="no" framespacing="0" allowfullscreen="true"> </iframe>
[button color="info" icon="glyphicon glyphicon-cloud" url="https:\/\/pan.yuos.top\/s/AquY?path=%2Fopenwrt%2F20220108" type=""]固件下载[/button]
查看3A的dts
partition@140000 {
label = "firmware";
compatible = "denx,uimage";
reg = <0x140000 0xec0000>;
};
};
3A的固件起始地址和终止地址是reg = <0x140000 0xec0000>
接下来就改些对应的地址就行了,其他命令基本一致
命令大全
考虑小白太多,算了,还是写一下吧
telnet 192.168.1.1
# 连接路由器
python.exe -m http.server
# 搭建一个临时的http服务器
wget http://192.168.1.2:8000/openwrt-ramips-mt76x8-xiaomi_miwifi-3a-squashfs-sysupgrade.bin
# 拉取源码
得到信息如下:
Connecting to 192.168.1.2:8000... connected.
HTTP request sent, awaiting response... 200 OK
Length: 12321568/0xbc0320 (11MB) []
Saving to address 0x80000000
[========================================================================] 100%
Transmission completed in 4.9s.
注意,这里存放的地址是0x80000000
,内存地址是0xbc0320
flash erase 0x140000 0xe80000
# 清空数据
flash write 0x140000 0x80000000 0xbc0320
# 写入数据
boot flash 0x140000
# 启动
Trying to boot firmware from 0x00140000 in flash bank 0 ...
Reading data into memory ...
U-Boot firmware image header detected.
Image Name: MIPS OpenWrt Linux-5.4.162
Data Size: 2533596 Bytes
Load Address: 80001000
Entry Point: 80001000
Socket error Event: 32 Error: 10053.
Connection closing...Socket close.
Connection closed by foreign host.
Disconnected from remote host(192.168.1.1:23) at 09:58:11.
# 这里就会重启了
如果成功,路由器就会自动重启,并进入我们刷的新系统中了,看到了openwrt
的界面。
虽然上一步已经成功了,但是很遗憾,断电重启路由器,进入breed
自动启动,breed
还是会从0x50000
处启动系统,那当然启动不成功了,和以前以前,会陷入自动循环重启中。怎么办?breed强大的环境变量功能来了,这些问题都是小case!首先进入breed的web界面,启用环境变量功能!这一步启动环境变量功能界面中,位置选择breed内部
其值默认即可,设置启用后,需要重启路由器,重启后再次进到breed
的web
界面中,上一个步骤已经设置启用了环境变量了,这一步我们就加上关键的环境变量,在环境变量界面,增加 autoboot.command
字段,值设为 boot flash 0x140000
,即可,这就是告诉breed
启动系统时,使用我们第5步中使用的那个命令boot flash 0x140000
,从0x140000
处启动,保存。
测试成果
重启,系统已经成功运行!